Capture One Tutorial.
Converting to B&W with Capture One.

All digital camera sensors generate colour images because they are equipped with a colour filter known as a "Bayer filter", named after its inventor. The Bayer filter strategically distributes the primary colours (red, green and blue) across the individual photosites of the sensor. As a result, each photosite records a specific colour value, rather than the overall luminosity at that point in the image.
To obtain black and white images, specific processing is required. Note that this processing can be carried out by the camera itself and you will then obtain monochrome images directly on your memory card. The disadvantage of this method is that it offers very few (if any) adjustment options. Processing is standard: if it's right, it's better, if not, it's too bad.
Instead, the best method is to recover the RAW colour file and convert it to black and white in post-processing using software such as Capture One. By opting for post-processing conversion, i.e. separating the capture of the image from the process of converting it to black and white, you retain the freedom to optimise each processing parameter. What's more, you can always generate a colour version and a monochrome version of each image.

Appearance of the Bayer filter
Note that photosites receiving green light are twice as numerous as those receiving red or blue light.
The method.


Converting to black and white with Capture One is really quick and easy. Once you have finished processing your photo (white balance, exposure, contrast, etc.), proceed as follows:
Click on 'Color' tab.


Look for the 'Black and White' tool. This tool has two tabs. First, we'll look at the first tab of this tool: 'Color Sensitivity'.

Tick the 'Black and white' box. The photo immediately switches to black and white in the preview.
Use the colour sliders to adjust the rendering of your image to your liking.
Moving a slider to the left decreases the corresponding colour, which is reflected in the black and white image
black and white image by darkening the areas of that colour.
For example, it's easy to darken the sky by moving the 'blue' or 'cyan' sliders to the left.

Effect of colour filters
The red slider has been pulled to the left: the skin (and therefore the face) is darkened.

Effect of colour filters
The red cursor has been pulled to the right: the skin is lightened.
The example above shows the effect of the red slider. As the face, or skin in general, always has a red component, moving the red slider darkens or lightens the skin, without affecting the (white) clothing.
The 'Split tones' tab.
Capture One allows you to add a dominant colour when converting. You can even select one tint for dark tones and another for light tones. In this way, you can obtain a sepia-toned photo or a cross-processed effect.
Click on the second tab of the black and white tool, called "Split tones", and adjust the sliders.
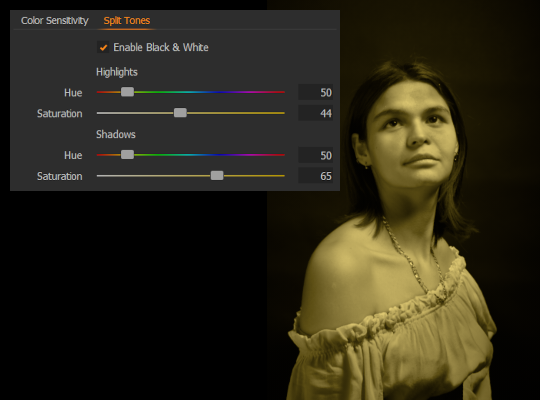
Sepia effect obtained by adding the same dominant colour to the light and dark tones.

A cross-processing effect obtained by adding a slight yellow cast to light tones and a blue cast to dark tones.
In the two examples above, the tonal separation sliders have been adjusted to obtain a sepia effect on the image on the left and something similar to what you would get with cross-processing in film: developing a negative film with the chemistry of a slide film (positive).
Other things to know...
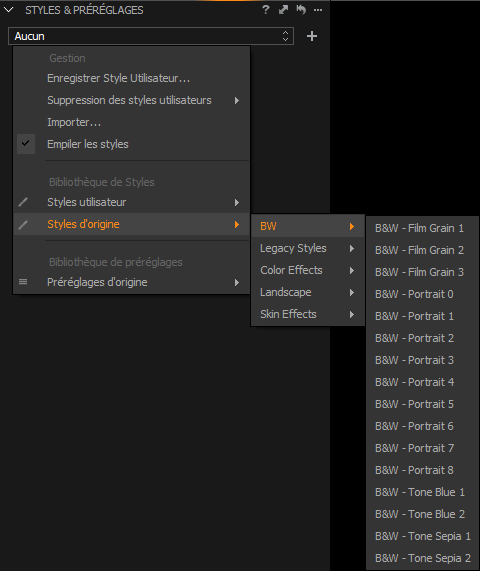
A number of pre-settings can help you convert to black and white. They come as standard with the software, in the 'Adjustments' tab.


- Several processes can be applied to the same photo without the need to duplicate the RAW file. For example, the photo can be converted to a black and white image without losing the settings made for the colour output. To do this, right-click on the image in the browser and select the 'Duplicate variant' command. You will then have two images that you can process separately.

If you liked this page, share it on your favorite network :