Tutorials about shooting (photography).

The shooting : the starting point of all photography. These tutorials present basic techniques such as measuring light or using a flash, as well as notions concerning the framing and the composition of the image.
The framing.

Framing is for the photographer to position the subject in the frame of his image.
The tutorial lists the characteristics of the framing: orientation, plane, high or low angle shot, frontality, etc.
The photographer must make a decision on each of these characteristics before pressing the shutter button.
Although this chain of decisions is most often intuitive, it is interesting to reflect on this subject.
The polarizing filter.
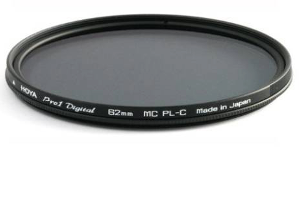
Using a polarising filter at the time of shooting can considerably improve the rendering of the sky or reflective surfaces such as a shop window or the surface of a lake.
This is because the polariser will reduce the amount of polarised light reaching the sensor, darken the blue of the sky, making clouds stand out, or suppress reflections
in a pane of glass.
Polarisation only works well under certain conditions: it is particularly sensitive to the orientation of the sun in relation to the axis of the shot.
In addition, it is not enough to mount it on the lens; it must be adjusted (by rotating it) to achieve the desired effect.
Measuring light.

The automatic mode of current cameras allows users to forgo measuring light before taking a photo. Indeed, these cameras incorporate a light meter and automation
that handle light measurement and adjust shooting parameters accordingly. However, in certain situations, automation may be unable to make the necessary adjustments.
This is the case, for example, in studio photography. In such instances, it becomes necessary to manually measure light using a light meter or flash meter.
Using a remote flash.

The term "remote flash" refers to a flash that is not attached to the camera. It can be positioned on the ground, mounted on a tripod,
held at arm's length by the photographer or handled by an assistant.
This way of working gives much better results than using the flash on camera: no more red-eye, and you'll finally be able to add some creativity to your photos.
This guide applies to both cobra and studio flashes.
Tutorial - Getting a nice bokeh.
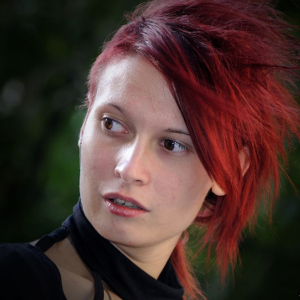
Bokeh, or soft focus, helps to make the subject of a photo stand out.
It can be obtained by working with a large diaphragm opening, but other parameters also need to be taken into account.
This tutorial explains how to obtain a beautiful bokeh.

If you liked this page, share it on your favorite network :