Capture One Tutorial.
Getting started with Capture One.

Capture One is detawtisation software: in other words, it can transform the RAW files produced by your camera into JPG files, which is a standard format. This operation can be used to fine-tune the photo: adjust the exposure and contrast, correcting white balance, remove small defects such as a stain on the sensor or a pimple on a cheek, etc. This operation is also called raw-processing, dematrixing or developing, by analogy with the film process.
Let's just say straight away that Capture One won't be very useful for you if you've set your camera to deliver JPG files directly, or if your camera can only deliver JPG files (compact, bridge or phone).
On the other hand, Capture One is not an editing or special effects tool like Photoshop can be. But in the end, very few photos need to be processed by Photoshop, whereas RAW Image Processing, with the adjustments we've talked about, is a compulsory operation on any RAW file,
Sessions or catalog?
The Capture One software is installed on your machine (at least the free trial version) and you have clicked on the icon to start the application. You will first have to choose your working mode: by catalog or by sessions. Although it's possible to work in one mode or the other, it's unlikely that you'll change modes once you have made your choice.
Capture One Catalog
Capture One Sessions
- Cross-search by keyword, date, etc.
You can search for photos relating to a subject, whatever the date they were taken and whatever the project for which they were taken.
- Easy to move a folder, restore from a backup, etc.
- Documents other than photos can be saved in the session folder: contracts, specifications, etc.
- Suitable for producing stock or illustration photos.
- Suitable for social photography (weddings, births, etc.), reportage, advertising and fashion photography.
Running Capture One.
The very first time you launch Capture One, you will be asked to create a new catalog or a new session.

If the software has already been run previously, it opens the last session or catalog used directly. If this session or catalog has been deleted from the disk or moved, Capture One redisplays the window above with a list of recently opened sessions and catalogs

Working with sessions.
A Capture One session contains all the photos and settings relating to a shooting session. All this information is saved on disk in a folder, with the name you have chosen for the session, and with four sub-folders.

Capture: the sub-folder in which RAW files from the camera will be stored. These photos can then (optionally) be moved to theSelectsfolder or theTrashfolder.Output: files generated by Capture One after processing, generally in jpg or tif format. Sub-folders can be created to divide up the images according to how they will be output: for the web, for printing, etc.Selects: photos being processed that have been marked as good.Trash: the trash folder, containing deleted photos. You can, of course, restore them as long as they are still in this folder.
The session folder can be copied or moved: you won't lose any information as long as you don't change the tree structure or the names of the sub-folders.
Create a new Capture One session.
To create a new session, you can either click on the New Session button in the start-up window, or run the command of the same name in the
File menu. This will display the following window. On this screen, you can define the name of the session (the main folder) and its location
on the disk. You can also change the names of the sub-folders (the screenshot shows the default names suggested by Capture One).

Import imges in the session.
We've just created a capture One session, now we need to import the photos, either directly from the camera if it's connected, or from a folder on the disk.
Click on the import button  . In the basic configuration, this button is the first one on the toolbar (the one furthest to the left).


 Cursor Tools


Select the folder containing the RAW files and click on the images you wish to process.
These files will be copied to the Capture folder. In principle, you can start working on the first photos even if the import is not yet complete,
but the response times of the software are then quite annoying. As soon as the import is complete, you can start work in earnest.
Working with a catalog.
A catalog contains a large number of photos, which may come from several different shooting sessions. The advantage of a catalog is that it can be used for global searches: for example, listing all the photos with the keyword "beach", or all those taken with a particular camera. Searching by keyword obviously requires manual registration of the keywords with each photo.
The same photo can appear in several catalogs. For example, it could appear in an album you have called "Portraits" and also in the "Women" album. You can also create intelligent albums, which automatically group together photos that meet certain criteria: type of camera, date, etc.
Capture One's catalog mode offers greater classification and search capabilities than its session mode. These features will be appreciated by photographers who produce illustrations.
The tree structure of Capture One catalogs is much more complex than that of sessions, and it is not advisable to change anything in the name or location of these folders.

Create a new Capture One catalog.
The command to create a new catalogue can be found in the File menu. It displays the window below, where you can choose
the name and location on disk of the new catalog.

Import photos in the catalog.
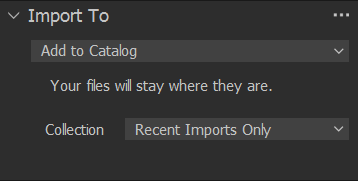
As with a session, the Import button lets you add photos to the catalog you've just created.
Cursor ToolsWith a catalogue, you have the option of copying the photos into the catalogue, or leaving the files in their current location: insert only a link to them in the catalogue. This second option allows you to include the same photo in several catalogues.

If you liked this page, share it on your favorite network :