Capture One Tutorial.
Remove an element of the decor.
Remove an element of the decor.

It is not always possible to eliminate certain unsightly elements present in the decor as soon as the shot is taken. Capture One allows these elements to be hidden in post-processing.
Capture One offers several types of layers :
- Adjustment layers: to apply one or more adjustments to a part of the image.
- Clone layers: to reproduce part of the image elsewhere.
- Heal layers: same idea: reproduce part of the image but with a combination different with the original picture.
These last two types of layers are very practical for making an unwanted element of the decor disappear.
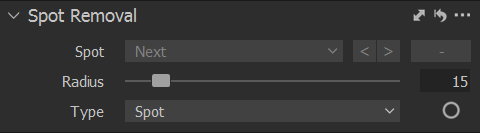
Attention ! To remove small imperfections (spots on the sensor or on the studio background, pimples or redness on a face, etc.) Capture One offers a much more suitable tool: the "Task Removal" tool.


The case to be treated.
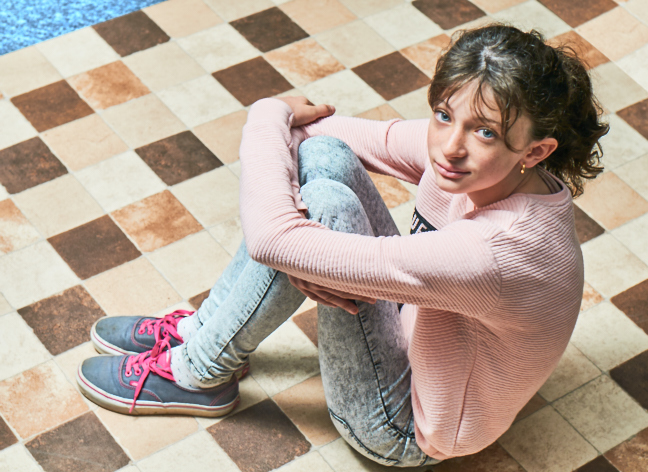
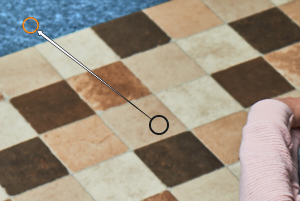
In this photo, the backdrop was a little too small to allow the desired framing. So we photographed a piece of carpet, promising ourselves to make it disappear in post-processing.
It should be noted that this correction is particularly delicate to carry out because the continuity of the geometric pattern of the tiles must be preserved. Copying grass, foliage or tar is much easier.
The method.
As usual, we suggest you download the original RAW file so that you can try out the same photo as us. You can then reproduce the method on your own photos.


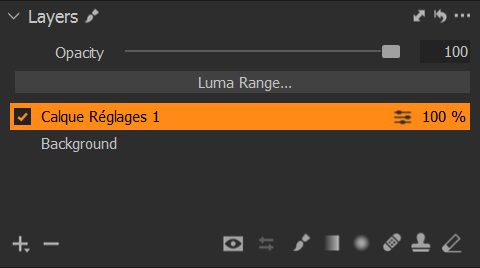
Layers can be accessed from several tabs : Exposure, Color, and of course the local tab.


Note: as the position of the tabs can be configured, the order of the tabs may be different in your installation, or even that certain tabs are not displayed. Refer to the tutorial Customizing Capture One.
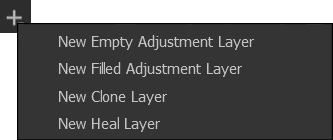
Add a clone layer.
To do this, click on the button  and hold the click until the menu appears.
You can then rename this new layer (but you don't have to) by clicking on its name in the list of layers.
Click on the Draw cloning mask tool  .
.
To use this tool, first click on the part of the image to be copied while holding down the ALT key.
Then draw the mask over the entire area to be removed, namely the blue carpet in the top left.
If you notice a gap between the copied image and the rest of the image, move the round handle to change the part of the image
to be copied.
Proceed slowly so that the image has time to refresh. Try to match the lines of the tiles.
Le résultat.
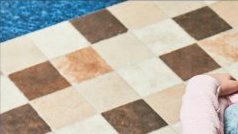
The blue carpet, clearly visible
in the top left of the image.
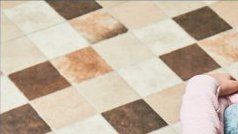
After correction, the tiling seems
to spread over the entire surface.
With a little precision, you should get an excellent result on this image. As we've already said, it's more or less easy to find which part of the image to copy, and geometric patterns are the most difficult to recover.
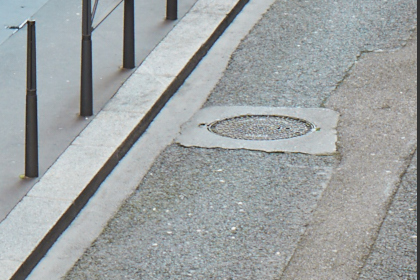

Making this manhole cover disappear was really easy using a copy layer. The tarmac pattern was repeated right next to it.

If you liked this page, share it on your favorite network :