Post-treatment of the eyes.
In this mini-tutorial, we'll take a look at a practical example of how to improve the rendering of the eyes in a portrait. The operations described can be carried out using Photoshop, The Gimp or just about any photo editing software.
This method includes eliminating red-eye (although this problem can easily be solved when the shot is taken), cleaning up the whites of the eyes, brightening the irises, adding catch lights, etc.
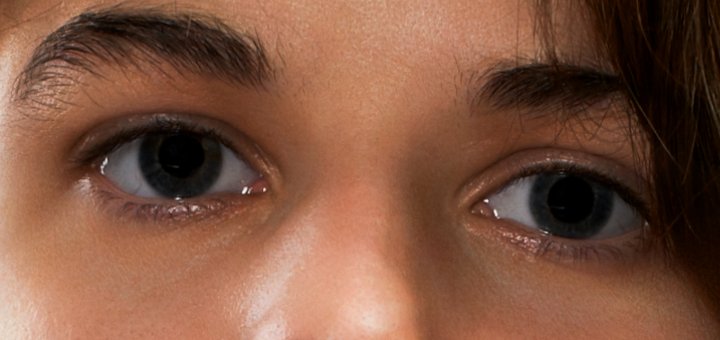
The original photo.
The photo was taken with a flash mounted on the camera and aimed at the subject. This is, of course, the worst solution: as well as making the eyes red, the direct flash also causes a spot of light (catch light) right in the middle of the eye, which destroys the relief of the eye. In principle, cameras are equipped with systems to reduce the red-eye effect, but it seems that this didn't work on this image.
It's a safe bet that the entire face is as poorly restored as the eyes: no relief and a whitish complexion. We will, however, take this photo as an example of improvement regarding eye treatment.

Work non-destructively.
It is always preferable not to modify the original image. This allows you to go back to a treatment even after you have closed the image. To achieve this, work on a layer containing a copy of the image (in this case, simply copy the eyes) or use adjustment layers.
What causes red eyes in flash photos?
Red-eye results from flash light reflecting off the subject's retina. And as the pupil of the latter is generally very dilated (weak ambient light) we end up with a large red circle which occupies almost the whole eye.
Of course, before thinking about post-processing, it is much better to take some precautions when shooting:
- Aim the flash at the ceiling if it is white and not too high. In a church, for example, this solution is not valid.
- Use a remote flash, i.e. not mounted on the camera. It is often enough to hold it at arm's length to considerably improve the result.
- Activate the camera's red-eye reduction system. The latter sends a succession of very rapid flashes to encourage the pupil of the subject to close down a bit. It's not always very effective.

Light from a flash mounted on the camera and aimed at the subject passes through the pupil, and is then returned to the camera by the retina. The latter is very rich in blood vessels: the reflected light is strongly tinged with red.

The simple fact of moving the flash away (or directing it towards the ceiling) prevents the light reflected by the retina from returning directly to the camera lens. The red back of the eye is thus invisible in the photo.
Red-eyes removal.
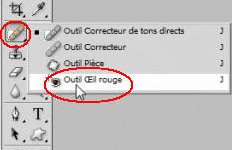
With Photoshop
Photoshop has an almost automatic tool for removing red-eye:
- Select the Red Eye tool from the palette.
- Then select one of the eyes. The selection does not need to be precise: Photoshop will locate the pupil and remove the red only where necessary.
With The Gimp
- Select approximately the pupil. If the iris is affected, it's not a big deal, but you must avoid the selection touching the eyelid. We're going to remove some red colour, and while the iris should be free of it, the eyelid (which is pink) is not.
- Colours/Hue/Saturation" menu. Click on the red colour to lower the brightness and, if necessary, the saturation..


Removing misplaced catch light.
Catch light is the point of light that shows up in the eyes. Here it is due to the photographer's flash, but it can also come from a window, a lamp or any other light source.
The one we see in the original image is centred right in the middle of the pupil; that's not the best place. The best thing to do is simply delete it. This is easily done with the correction tool. The result is the image below, which isn't much better, but which we'll continue to work on.

Whitening and cleaning the whites of the eyes.
- Use the correction tool to remove any spots or veins that are too visible in the white of the eye.
- Select the white of the eye, soften the selection and increase the brightness. Be careful not to go too far with this setting, or you risk turning your subject into an alien with fluorescent eyes.
Lightening the iris.
This operation is not always necessary but here it will improve the photo.
- Select the iris, soften the selection, and increase the brightness.

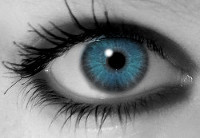
Added Catch Light.
These black eyes are not alive. We are going to artificially recreate catch lights in the eyes. The best position is around 10 o'clock or 2 o'clock.

Catch light at 11 o'clock
Catch light at 2 o'clock
To add catch lights :
- Use a soft round brush and white color to place a point of light in each eye.

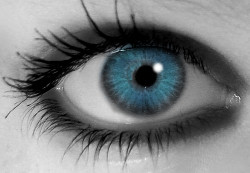
And here's the result.
The job is done. Compare the original photo with the last one we just got. I think you will agree that it is worth it. But again, better preparation during shooting would have reduced a lot of the time spent on the computer.
A little additional tip: we see in this image that the iris is “eaten” by the pupil because the latter is very dilated. This is of course due to the fact that the photo was taken in a fairly dark atmosphere (hence the use of the flash). By directing the light of a lamp onto the model's eyes for a few seconds, the pupil is closed: the circle black is reduced in favor of the iris and its beautiful colors.
Starting picture
Image after processing

If you liked this page, share it on your favorite network :