Your camera doesn't know how to measure light.

This slightly provocative title introduces a few explanations about the measurement of light as used by cameras.
Automatic and semi-automatic exposure modes inevitably require light metering, in order to determine the settings to be made on the camera: aperture, exposure time or sensitivity. The cameras are therefore equipped with a light metering cell, which eliminates the need for the photographer to use a manual light meter. This page explains why this measurement of light by the camera is inevitably inaccurate. We also propose a number of practical tests that you can carry out at home to verify our assertions.
First of all, a little experiment.
- Set your camera to automatic or semi-automatic mode (shutter priority or aperture priority, it doesn't matter).
- Place a sheet of white paper in the light and photograph it, framing it so that the sheet takes up all the space in the viewfinder. Make sure that the light is homogeneous over the entire surface of the paper.
- Repeat the operation with a sheet of black paper or card.
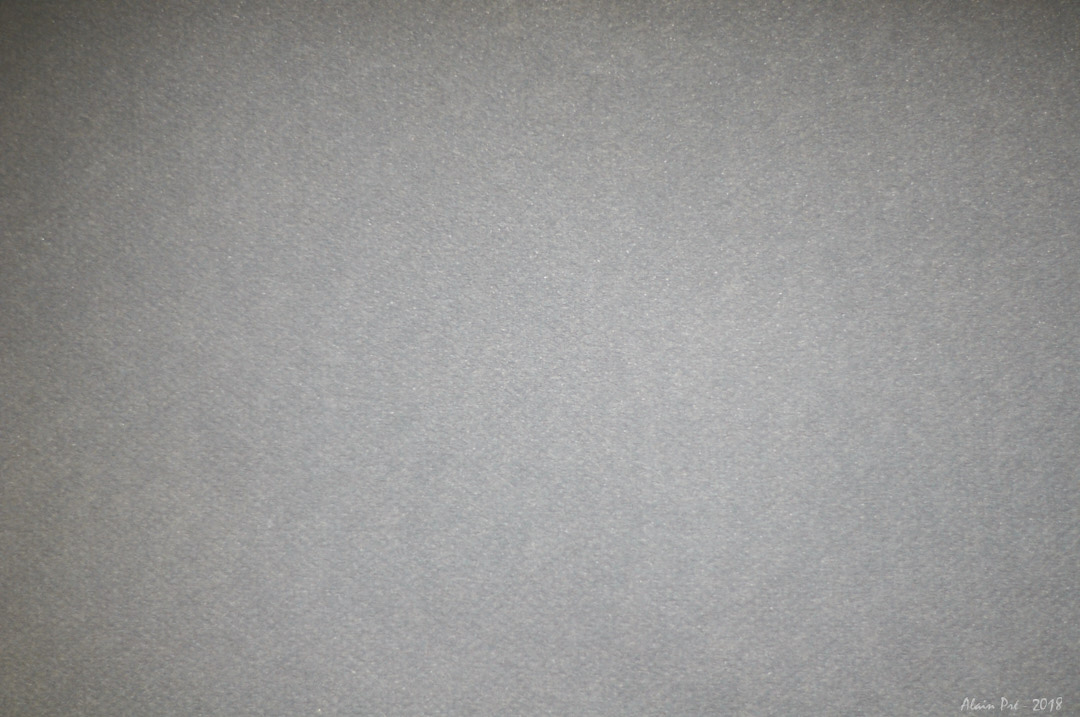
Here are the two photos you'll get from this experiment. Disappointing, isn't it? We would have liked the black to appear black in the image and the white to be white. But the two photos appear grey and in exactly the same tones. It's hard to believe, but give it a try and you'll get the same result.

A sheet of white paper
A sheet of matt, non-glare black paper
The explanation.
To understand the reason for this surprising result, we need to know how the automatic or semi-automatic modes of cameras work. Before taking the photo, the camera measures the light entering the lens, i.e. the light reflected by the subject. The electronics then calculate the average value of all or some of the pixels in the image and, finally, the shooting parameters (exposure time, aperture and, if necessary, sensitivity) are adjusted so that the exposure conforms to this average. The automatic system ensures that the average luminosity is positioned in the middle of the histogram.
Note: cameras offer a metering mode called "spot" which, instead of calculating the light from all the pixels in the image, considers only a few pixels around the collimator chosen for focusing. In our experiment, this will make almost no difference, as the two images are uniform.
In the case of the white sheet of paper, the pixels are bright; the camera has therefore closed the diaphragm (or reduced the exposure time) to bring the luminosity to the middle of the scale.
In the second case (black Canson paper), the pixels are practically all identical and not very bright. The automatism has opened the diaphragm to bring this "darkness" to the middle of the scale.
We therefore obtained two almost identical photos. The automatic system compensated for the difference in luminosity between our two subjects.
The EXIF show how the automatic system reacted. We were on shutter speed priority, so the aperture was set:
White sheet of paper: 400ISO - 1/60 - F/7,1
Black sheet of paper: 400ISO - 1/60 - F/1,6
And the histograms show that the automatism has done what it was designed to do: bring the average luminosity of pixels to the middle of the scale.

Histogram of a white sheet

Histogram of a black sheet
And anything we can photograph that's more or less even will give us a grey photo.

A grey cardboard sheet

A sheet of checked school paper
Here, at last, is a photo where the sheet of white checked paper and the black Canson paper have been placed side by side.
The reproduction of the white and black is correct because the average luminosity (the grey) has been positioned in the middle of the histogram, rejecting the white
and black at the ends of the histogram.

Conclusion.
Granted, the subjects chosen are a little extreme: photographing blank sheets of paper or black cardboard is of very limited interest. Nevertheless, this effect will be noticeable in realistic cases such as a portrait in front of a white wall, a skier on snow, or even a bather (although water is not white, it is very luminous), etc.
What to do then?
First of all, it's important to put the problem into perspective: in most cases, this method of measuring light gives good results. It is only in the slightly extreme cases we have mentioned (snow, large bright surfaces, etc.) that the photographer needs to take control of the exposure setting, as the automatic system may fail.
There is, however, another case where manual exposure is required: when a series of photos is to be taken with different subjects, but it is desirable to keep the same luminosity between all the images. For example, to take a series of portraits in front of the same backdrop, with the people dressed in light or dark colours. When these photos are placed side by side, in an album for example, it is really important that the background is always exposed in the same way.
/Here are some solutions to solve the problem:
- Use a light meter to measure incident light, which will not be affected by the colour of the subject.
- Compensate mentally to cancel out the dominant of the environment.
- Use spot metering. This means asking the camera not to take into account the whole image but only a small area, usually around the collimator. But be careful where you place this measurement. If the subject is dressed in black or white, you should not aim at the clothes but rather at the face to measure the light.

If you liked this page, share it on your favorite network :