Workshop photo sur Lyon.
December 2015 - Using flash creatively.

This workshop is aimed at photographers who have an SLR camera and are familiar with the main camera settings (aperture, exposure time, sensitivity, etc.). This workshop is based on practical experience, group work and exchanges between participants. (we're here to have fun, not to go back to school).
The subject chosen for this session will be "How to use your flash creatively ?". Even when there's enough light to take a good photo, the flash can add that extra something that will make it a professional image.
Participants who have a cobra flash or studio lighting can bring it with them. Alternatively, two Elinchrom flashlights will be provided. A tripod will also be useful for some practical exercises.
If the weather is not too cold or rainy, some of the images can be taken outside.
In particular, we will be looking at the following points :
- Portraiture against the light, using the flash to bring out the shadows.
- 2nd curtain flash synchronisation
-
Day for night.
This process, used mainly in cinema in the 70s and 80s, is used to simulate the effect of night or twilight, when the scene is filmed or photographed in daylight. - Flash and street photography.
Some results.
This session took place in December 2015: the images made by the participants are available. Here are a few of them.

Outdoors, and even in daylight, a cobra flash can be used to highlight the subject and blur the background.
Photos by Bernard Beguin, Alain Pré, Bernard Boisson and Alexandre Duflot.
Models : Kalif, Aurore, Delphine and Marion.
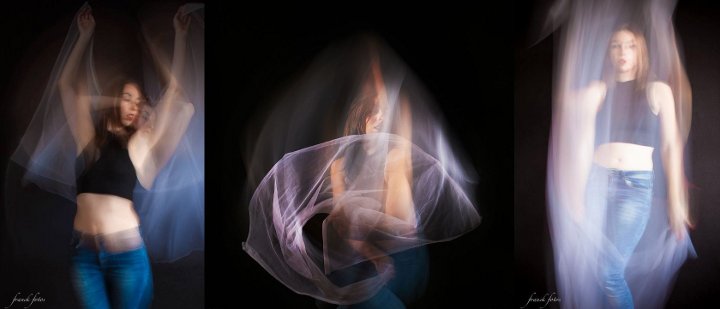
In the studio, a flash synchronised on the second curtain and combined with a long exposure allows the movement to be reproduced.
Photos by Franck Fotos and Alain Pré - Model: Aurore.
Practical informations :
Prerequisites: ability to use a reflex camera in manual mode.
Date : Sunday 13 December 2015, from 10am to midday.
Location : Studio Lyon 7
Equipment required.

Your camera
Essential

A cobra flash
Highly recommended given the theme of this session

A studio flash
If you have one and it's easy to transport

A radio flash trigger
If you have one
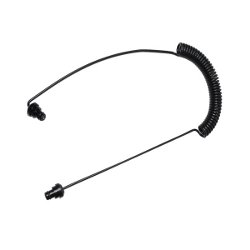
Wired flash trigger
If you have one
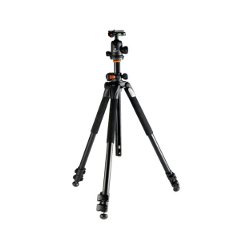
A tripod
Optional but will be useful for some practical applications
Equipment will be available on site for everyone to experiment with: two studio flashes, a cobra flash, a trigger for the studio flashes, a radio transmitter for the studio flashes or cobra flashes (transmitter/receiver pair), a flash cord, two tripods.
Some information on the techniques that will be used during this workshop.
Clearing a backlight portrait.

Portraits taken in full sunlight have very pronounced shadows that are rarely aesthetically pleasing. In the case of backlighting, the face may even appear completely black. Using a flash to unblock the shadows is the solution.
For the flash to be effective, you need to be fairly close to the subject: no more than 2 metres away. You can use the camera's built-in flash or, better still, a remote flash, which allows the photographer to move around or change the framing without changing the light on the subject.
Ideally, you should be able to soften the light from the flash. There are lots of accessories that can be fitted to the flash to soften the light, But you can 'cobble together' something with a sheet of tracing paper or white paper. For the built-in flash, you can pierce a ping-pong ball and position it on the flash.
Position the subject against the light: outdoors, with their back to the sun; indoors, in front of a window.
Sample settings :
- Set the exposure to "shutter priority" and select an exposure time of around 1/125th. This speed is slower than the flash synchro speed and is sufficient to avoid the risk of camera shake.
- Carry out a spot measurement on the luminous background (the sky, the window, etc.) and read the aperture. You can adjust the exposure time and/or sensitivity if necessary, but make sure you stay below the flash sync speed.
- Switch to manual mode and display the settings determined above.
- Set the flash to manual and make a few attempts to adjust its power until you obtain a correctly exposed subject. Ideally, of course, you should have a flash meter: it saves a lot of time. On some cameras, and using the built-in flash, you can set the flash to automatic (TTL) but with compensation: if the image is underexposed by -1IL, the flash power is corrected by +1IL.
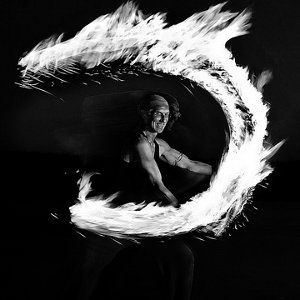
Photographing movement: second-curtain flash.
For a good understanding of the flash synchronisation mechanism, see this tutorial.
Synchronisation on the second curtain allows you to have both a sharp subject and a blur reflecting its movement. In the case of a linear movement of the subject, the blur will be behind the sharp image, which conveys the impression of speed.
This practical exercise can be carried out using studio lighting, with the camera placed on a tripod.
Sample settings :
- On the camera, set the flash to fire on the second curtain.
- Choose a fairly long exposure time, between 1/10th and one second.
- Take a few test shots to adjust the exposure time and aperture. The effect of the exposure time will be visible on the moving part, while the aperture will affect the exposure of the still part of the image.
Create a twilight atmosphere (the "American night" or "day for night" effect).

This technique was originally used in cinema to film night scenes during the day. It can be used in photography to make a sky appear darker than it really is, giving the impression of a photo taken at dusk. More generally, it can be used to underexpose unattractive scenery.
The technique is particularly interesting outdoors, but can also be used indoors, as long as you keep the subject away from the background.
Sample settings :
- Set the sensibility to 800 ISO.
- Switch to "shutter priority" mode, choose a shutter speed and read the aperture value measured by the camera to ensure correct exposure. If you have a light meter, using it will be quicker and give a more accurate reading.
- Switch to manual mode and display the shutter speed and aperture settings just determined.
- Set the sensibility down to 200 ISO. You can take a test photo: it should be very underexposed.
- Turn on a cobra flash and set it to manual mode. Avoid using the flash mounted on the camera: the result will be much better with a flash at 45°, placed on a stand or held by an assistant. The flash can be triggered using a radio trigger, or a cable between the camera body and the flash. In the absence of a remote flash, and indoors, you should at least point the camera flash towards the ceiling to avoid direct lighting.
- Using a flash meter, adjust the flash to restore the initial exposure. If you don't have a flash meter, start with a flash power of 1/2 then take test photos by changing the flash power until the correct exposure is found. We will base ourselves on the histogram to evaluate the exposure, and not on the rendering on the back of the camera.
Flash and street photography.

Lstreet photography is a genre in its own, which consists in photographing people in a public place and without these people being warned. Expressions of surprise or spontaneity are the characteristics of this kind of images (see Wikipedia).
When the photographer uses a flash, he must be close to his subject and the flash can hardly go unnoticed. With a flash, we will therefore obtain a reaction of surprise rather than spontaneity.
It is also necessary to work with a short focal length: 50 mm at the most. A 35mm would even be more recommended. Telephoto lenses are totally excluded because the light from the flash decreases very quickly with distance: the photographer must therefore be close to the subject.
For examples of this kind of photos, you can look at the work of Bruce Gilden, a specialist in the genre.
The flash should not be mounted on the body: hold it at arm's length, or ask an assistant to point it at the subject for you. Triggering can be done by a radio transmitter or by a cord connecting the box to the flash.
To stay in the spirit of street photography, you have to ask the model to move as you please and be ready to shoot at the right moment. Or better yet, use passers-by, but in that case, it's better to have an explanation ready to provide them.
For the background to be well blurred, the subject must be far from the background. It is therefore useless to ask the subject to walk along a wall. Consider a head-shoulder framing. It is indeed necessary to avoid framing the ground because this one will inevitably receive flash light and this will produce a bright spot in the foreground of the image.
Focusing can be done automatically provided the camera is fast enough. Most of the time, it's best to disengage autofocus and pre-tune based on a predictable distance to the subject from 1m to 1.50m. In any case, we can work with a very closed diaphragm, which gives a great depth of field and allows rough focus. Either way, the background will be inconspicuous, not because it's out of focus, but because it's underexposed.
Sample settings :
- Adjust the exposure compensation on the camera to -2IL, or even to -3IL.
- Choose the "Aperture Priority" mode and select the smallest aperture possible while remaining on an exposure time compatible with freehand shooting: 1/60th of a second is a reasonable limit.
- Set the flash to manual mode (neither slave mode nor TTL mode) and choose a power of 1/2 to do a first test. One or two test shots will adjust the power of the flash to obtain the correct exposure of the subject. It is normal (and even wanted) for the background to be underexposed.

If you liked this page, share it on your favorite network :